Review of the Lomography Sprocket Rocket
In November 2025, I bought an early Christmas present for myself: The Lomography Sprocket Rocket via Analogue Wonderland.

The Sprocket Rocket is a plastic film camera featuring a plastic lens that allows for panoramic shots, including the film sprocket holes in the exposure. The camera is fully manual with very few settings. You load the film, close the clip-on back, and wind the film on until a white dot appears on top of the camera, and you are ready to take a photo. If, after taking a photo, you forget to wind on the film, you will take a double exposure! Great when making an artistic choice… not so good when you have forgotten!!
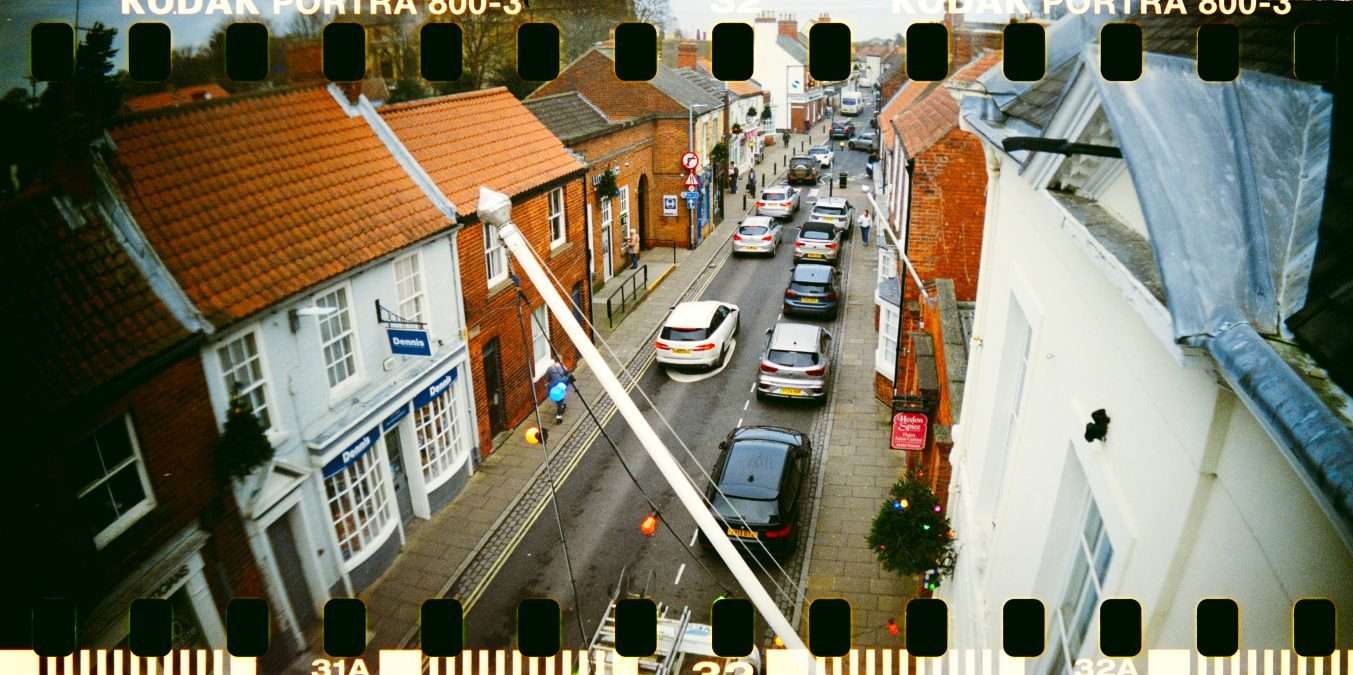
The image you expose covers two normal frames (so a 24-roll of film gives you 12 images, 36 is 18), providing a final panoramic-sized photo. There is a frame that you remove from the camera, which allows you to expose the parts of the film normally hidden – the sprocket holes. The sprocket holes are the small rectangular perforations on 35mm film, located on each edge of the film, and are used to guide the film through the camera from its canister. The resulting photos give you a really unique look.

Unboxing a Lomography product is an experience to be savoured! With the Rocket comes an accompanying booklet and poster, which are really quite cool. However, you don’t receive a manual, for advice and guidance, you must go online. There are sample photos too on the Lomography website.

Camera Controls:
Controls on the camera are few. Focus is manual by twisting the lens along a range from a flower icon (0.6 – 1m) to a mountain icon (1m to infinity). Shutter speed has two options: a normal shutter press at 1/100 speed or switching to bulb mode. In bulb mode, you keep the shutter pressed and time your longer exposure. Aperture control has two options: a cloud symbol designates f/10.8, and a sun is f/16. A key to making a better exposure is to consider the ISO of the film you use.

The Sprocket Rocket espouses everything that I returned to film photography for. Firstly, it’s fun. It’s an inexpensive camera that doesn’t weigh much. You can simply throw it in your bag and take it anywhere. It slows you down because, despite so few settings, you have to consider the basics before taking a shot, and specifically consider how much light is in a scene. You can use it handheld or attach it to a tripod. There is a hot shoe to attach a light, but I’ve not tried it yet.
When you compose a picture by looking through the viewfinder, remember it’s a blurry, rough guide only to the final shot. Leave enough room in your scene so that you don’t lose important detail in a sprocket hole! I’ve used four films in the Rocket so far and have got wildly different results. And in a world of instant digital imagery, there’s a real excitement when waiting for your images to be developed and scans to be sent back to you.

Conclusion:
While the camera is inexpensive, buying film is expensive. My four films probably cost more than the cost of the camera. Developing and processing film from the Rocket in a lab costs more than normal film cameras, because sprocket scanning requires special measures and comes at a premium. Note that some labs do not process sprocket scans, so do check before sending in your films from this camera.
However, despite the costs involved, I am thoroughly enjoying using the Sprocket Rocket. My latest film in the camera is Revolog Lazer 400… what fun! Film photography is certainly not digital photography. It’s a different kind of pleasure and fun – but fun indeed!

Gallery of images scanned at Analogue Wonderland with a Nikon D7100.


