We asked for a re-edit of any of these four images:
We asked for a re-edit of any of these four images using the editing tools available to you. These tools might be on your camera, phone or computer.
 |  |
 |  |
THE RESULTS:
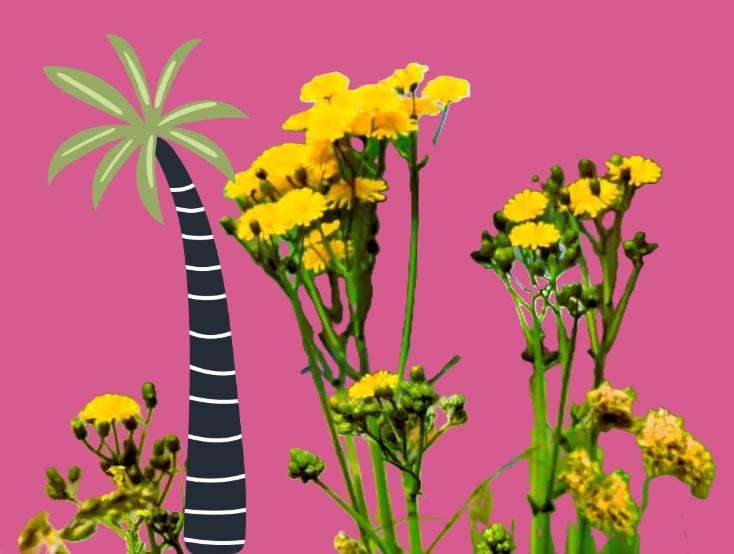
Janet Bucknall

How I did it: “I chose the flower photo. I cropped it, enhanced it to a more golden colour. Then I blurred the background. I then went on to Microsoft Design, removed the background, added a coloured background, and then a new plant image.”
Ray Duffill

How I did it. Didn’t do much. Flipped the image upside down. Called it ‘Dalek shadow in sand pool’.
Rob Stirling – 2 edits.

How I did it: “It was shouting out for colour pop!
Load in the photo. right click on the background layer and select duplicate, and edit the new layer name to B and W.
With B and W select the adjustments icon and select black and white. Grab this adjustment and drop it into B and W layer to affect only that 1.
Adjust the sliders for greater control.
With this selected layer, click on the add mask icon and select the resultant mask layer.
Go to the paint brush tool and use the 2 colours, black and white, paint on the mask to either reveal the colour below or cover it back up if you’ve made a mistake.
Save as or save the project with a relevant name, and when happy, go to file>export to save a photo as jpeg.
Phew!

How I did it: A light-hearted edit.
Duplicate the original layer and renamed it WIP.
Use Filter>distort>Pinch/Punch to enhance belly and ‘chest’
I realised this messes up his arms, so back to the original, select each arm individually and copy and paste to a new layer. Add a mask to each and mask off or on to suit.
Arrange layers so that normal sized arms are visible but coming from underneath the extra flesh.
Copied and masked Ronand McDonald on his own bench and painted out to suit
I used the Inpaint tool to get rid of the right side wheel and the clone tool to get rid of the bike.
Copied and pasted as new layers, the right hand and left rubbish added masks and painted out or in backgrounds to suit.
Note: when painting in black and white to show or hide underneath, keyboard shortcuts are
- X for toggling colour
- Square brackets open and close for making the brush smaller and bigger.
Chris Barker

How I did it: “I enlarged this first, then turned it upside down and added a bit of colour on the bit of metal at the bottom. Done on phone.”
Maggie Wingfield

How I did it: “Cropped the image
Opened in photo editing App and blurred the background.
Removed the handle bars using an erase tool.”
Dave Hook

How I did it: (using Photoshop).
“Cropped the image. Converted to monochrome. Dehazed.”
Thanks!
Thank you to Janet, Rob, Chris, Maggie and Dave for taking part. Thanks especially to Rob for his detailed step-by-step Affinity menu.
If these editing practice challenges are interesting and useful to you, let me know in the comments.